Sunday, March 1, 2015

Handmade Valentine's Day Cards

I had so much fun making my little nephew and nieces some little Valentine's Day cards.
This little Bee is from Cricut Cartridge, Spring Holiday Cards.

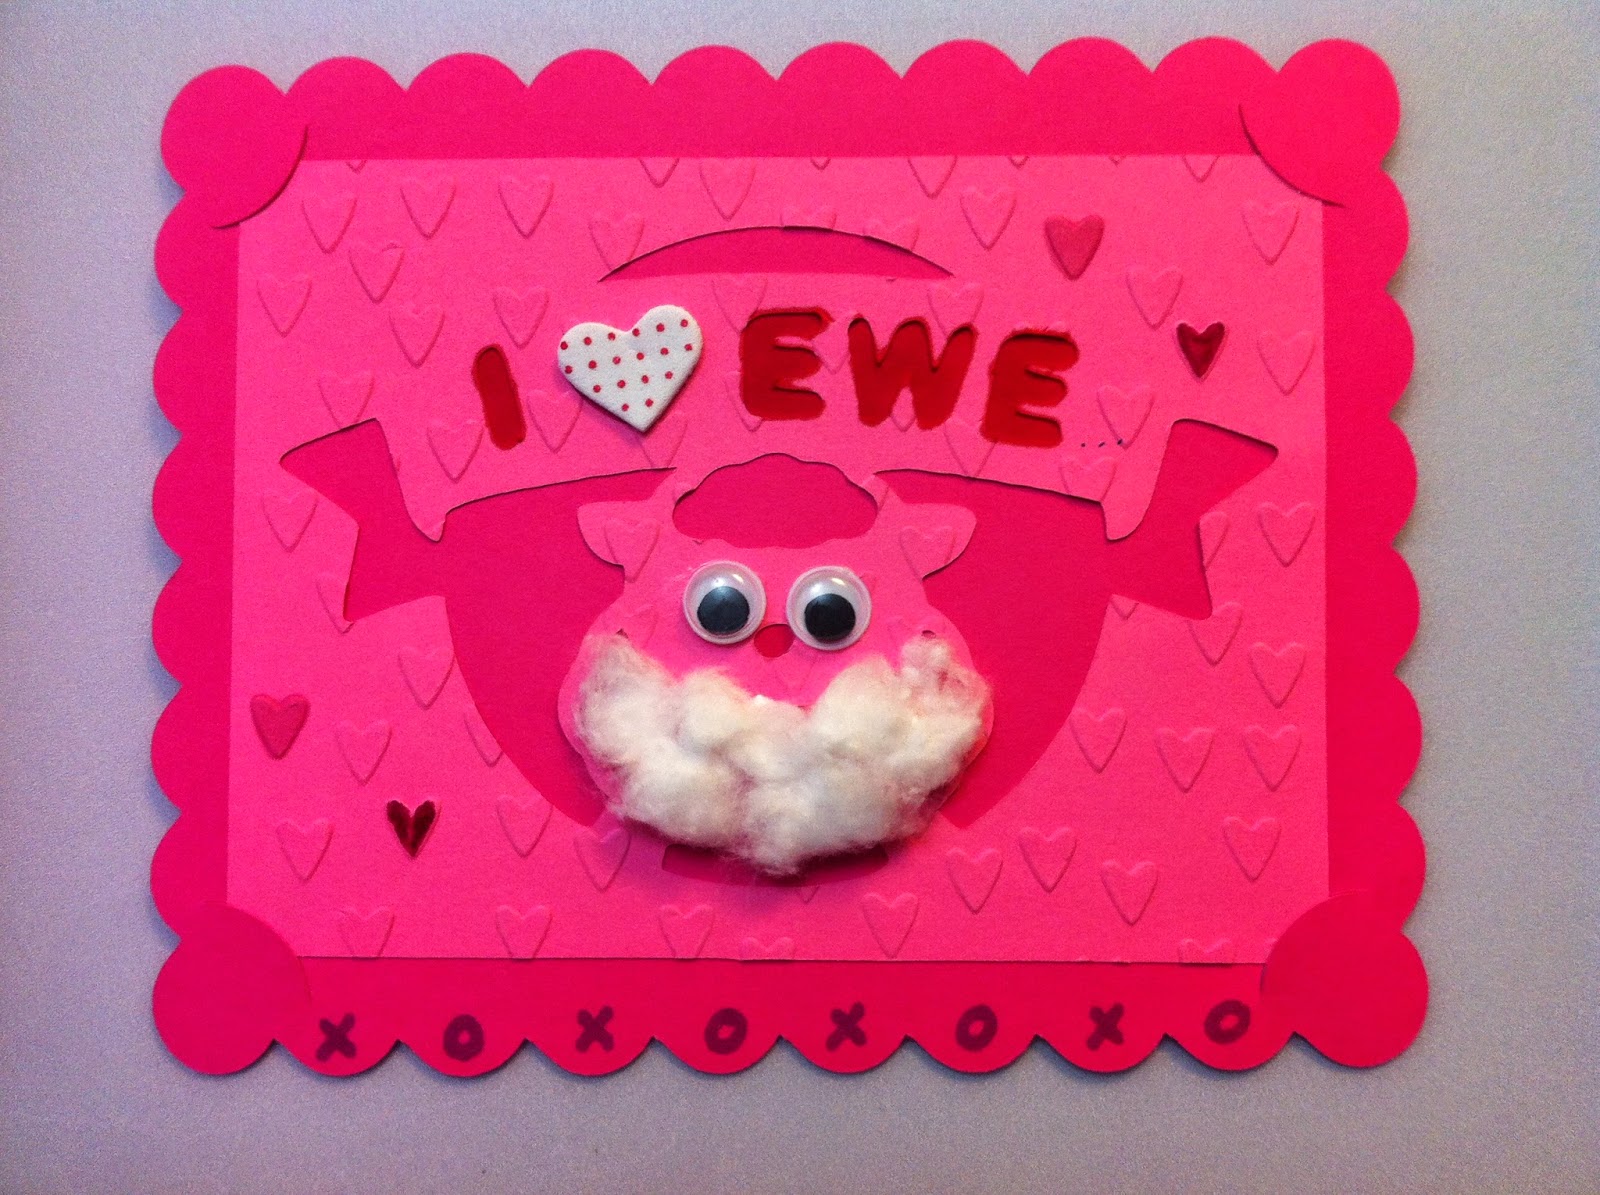
The little Ewe is also from the Spring Holiday Cards cartridge.

The Cheshire Cat from the Disney Classics Cartridge

Thumper is also from the Disney Classics Cartridge.

I then made some adult Valentine's Day cards (I actually forgot to take pictures of a few of them, boo.)


With this one, I tri-folded white card stock, then measured another piece in pick for the first layer and a second piece in white, put them in my cricut and cut a heart out, then I cut right down the middle of the heart.  I used the pink heart of the inside of the card.  The embossing was done using the Cuddlebug.


This card was made using the beautiful paper pad by Graphic 45 "Sweet Sentiments" there are such lovely Valentine's Day and Easter images and paper.  This was from the 8x8 pad.


I bought this downloadable image from an Etsy store.  My husband just loves everything "Skull" and he got a real smile from this card.


My blog was HACKED!

Well I was very surprised to find that my blog had been hacked.  I got a notice from Pinterest (Go Pinterest!) that a fellow pinner visited my blog, which made me wonder when was the last time I myself had visited my blog. Sadly, life has been extra-ordinarily busy and the blog was set aside.

I clicked on my blog link and was incredibly dismayed to find it immediately redirected to spam sites!  I consider myself to be a moderately crafty person, but a software programmer I'm not! I had no idea how to fix it.  The words of my lovely daughter floated in my head "Mom, Google knows everything!" so off to Google I go and within a minute I had the fix.  I came upon this site: http://aw-snap.info/blogger-tool/ (if anyone else is suffering from a hacked blog, I would recommend that site) and found the problem was coming from another blog site that I had listed in one of my gadget.  I removed that site and problem is resolved.  My apologies to anyone that visited my blog and ran into spam re-directs, that certainly was not my intention.  I will pay closer attention to my blog from here out.

Wednesday, August 6, 2014

Painted Bottles

I've been collecting bottles for a while now. I have many different shapes and sizes, which I love to paint and then distress. These are the latest ones that I've done and the blue matches the blue centers of the cabinet behind the bottles.

A lady's diary

made this with my sister who also made one and we crafted via Skype. This took slightly over a year to make as we only worked on it when we could do it together. We followed a tutorial that I found on YouTube and I will have to look up that information and post the link to the tutorial here. We used the ladies diary paper packs and stickers from graphic 45, a variety of embellishments that we both made and bought, buttons, lace trims, decorated paperclips and our cricut.  I am not actually using this as a diary but rather it will be a photo album, with photos of all sizes put on the many different mats that we made.  (I found the link, click here.)


Hardanger

I made this for very dear friend of mine for her birthday. She absolutely loved it!

Friday, March 14, 2014

Old bottle


This started out as a clear glass apple cider vinegar bottle. I started with a dark brown paint that I brushed on waited until it's dried and then I painted over that with a steel blue color.  Both paints were sherwin Williams I think. They crackled naturally then I took the piece of extra fine sandpaper and sanded down to the brown paint in some spots.

Sunday, February 16, 2014

Scrapbook page


I used the Cricut Damask Decor cartridge for the elements in the upper left and lower right corners.


Titanic


The lamppost was made using cricut ornamental iron cartridge. The Bow Tie style of bow I learned to make following a YouTube video which you can find here. The little tiny flowers in the center of the bow tie's I learned to make following another video which you can find here.

When I made the Bow Ties, I did not make the punch that was used in the video so I simply made a template, cutting out the "punched" areas where required with a small pair of scissors.  The punch would have made it super easy, but really it wasn't that hard at all just using scissors.

When I made the little baby prima roses, I used the super small 5 petal punch, I think it's about 1/2 inch, and they came out really tiny and ended up being the perfect size for scrapbook pages.  

Sunday, February 2, 2014

Saturday, February 1, 2014

Valentine Cards for 2014


I first saw A similar card posted by Faithabigaildesigns.com on Pinterest. The heart shape was cut using the cricket cartridge Folk art festival and the girl with the puppy behind her was cut using A child's year cartridge. The little white rose is a button and the font that I use is MC sweetie hearts that I downloaded for "free for personal use " on dafont.com.


   This next card I first saw a similar one on Pinterest by Stampinconnection.com. The crafty paper  heart was cut using the cricket craft room basics cartridge and the red heart on top is actually a paper Doily. The small filagree Red heart was cut using The Folk art festival cartridge with the shadow layer behind it and the heart under that is again another shadow layer drawn out slightly larger with a small red heart shaped gem on top. The paper with the postage stamp on it is from the love stack by recollections.

Wednesday, November 13, 2013

Getting The Hang of Hardanger!

Here is another doily (making this my 3rd) that I made and it measures approximately 14 x 14. 

Monday, October 21, 2013

My second Hardanger embroidery piece

The finished piece is approximately 12 x 12 and the accent color is a steel blue. This was done on 22 count white Hardanger fabric.


Wednesday, September 25, 2013

Fall Decorations


My sister and I made fall wreaths And here is the one that I completed.

We also made a couple of tabletop pieces.


And I painted some old bottles with silver metallic paint scrape the paint off a bit and added some scary Halloween labels and orange raffeta. 


Friday, September 20, 2013

Almost done!

I am getting so close to being finished with my first piece. I've made several mistakes which means I wont be giving it as a gift, but I'm still pretty happy with it!


I finished my first piece!

Sunday, July 7, 2013

Another Craft!

As though I don't have enough half finished projects laying around, I just HAD TO start another one and this time it's worse...it's a new craft. I'm learning Hardanger Embroidery.  This is also known as White Work. It's typically done on white cloth with white thread and it's gorgeous.  I'm talking Heirloom kinda gorgeous.

So, I went out and bought a book "Beginner's Charted Hardanger Embroidery with complete instructions" by Susan Meier and Rosalyn Watkemo.  It has the different stitches in the front and does explain them.  Then it has some patterns and very nice patterns they are. But. and I do mean BUT, the instructions are so cryptic
that I'm glad I joined a Hardanger Forum, I will need them to help me figure out the instructions *sigh.  For a complete beginner leaving out one or more sentences in order for an explanation to be made in 20 words or less is not so helpful.  Example (this is word for word) "Trim around the edge after it was been secured with the sewing machine." ummm huh? "secure with the sewing machine"?  How exactly would one "secure with sewing machine" the border of this piece?


Tuesday, June 18, 2013

My First Glass Etching!

     I didn't have a clue what to get my husband for Father's Day.  While making the invitations for sister's birthday party, I came across my Wall Decor and More cartridge that has a very nice/fancy skull and I had just bought some nice wine glasses.  I used some vinyl that my sister gave me, cut the skull and the initials out and tried to place the "mask" of the design onto the glass.  This didn't work out so well and the skull came out crooked.  I then realized that I needed to put the design on tape first so that I could correctly place it on the glass.  I didn't have any of the transfer tape that I've seen people use, so I opted for painters tape.  I wanted to take most of the sticky off the tape so I pressed the tape onto my tee-shirt a couple of times, then over the design and then the whole thing onto the glass.  I press the vinyl down really well and lifted off the painters tape. All looked great on the second glass.  On both glasses, I used a foam brush to put a thick coat of Armour's Glass Etching Cream (pretty sure that is the name of it) and let it sit.  I got anxious and ended up rinsing off the cream ( using warm water ) after just a couple of minutes the first time and the second time, I waited about 7 minutes.  They turned out beautifully, but I think if I had waited 15 minutes on both, the etching would have been deeper and nicer.

     If you want to try glass etching, it's really simple and really fun BUT be very very careful not to allow any of the cream to get anywhere on the glass that you do not want etched.  Even a speck of cream will etch the glass, so when you cut your vinyl, give yourself plenty of edge so that you have room for the cream to slip and slide a bit.


    You might be wondering why I chose to put skulls and these beautiful wine glasses. Well, my husband LOVES skulls, they are just his thing and I was right, he loved them!

Party Invitations

I'm hosting a 50th Birthday Party for my youngest sister with the help of my older sister and niece and although we had all decided to not make the invitations, which would save a load of time, I wasn't able to find any that were suitable.  The only invitations available were for wedding, graduation, child's party, and baby shower.  I ended up making the invites and for the sake of time, I had to keep it simple.  I used the Lacy Labels to cut the basic shape of the invitations (double sided cardstock)  which is really nothing more than a rounded rectangle. I then scored both sides and folded them in.  I used Ivory Cardstock for the insert with all the info being printed on my printer and then ran that through my cuttlebug for the emboss on the sides and the back of the envelope.  I cut the flower shape (Core'dinations Color Core Cardstock) using Cricut Craftroom Basics, ran that through the cuttlebug for the embossing, glued one side of it to the left side of the invitation using Aileens Tacky Glue (I've learned my lesson in using tape runners...although it say's "permanent" it really isn't and things fall off after awhile. This doesn't happen with Tacky Glue.) and then tied the invite together using a pale pink ribbon.